These are extremely customizable, and great for use on recommendations pages. All of the math has already been done for you! You can select from a variety of frame styles, customize the colors, as well as the size. When creating Gallery Collections or recommendations to show clients, these can be used to quickly and easily add "virtual" frames to your images. It really makes a big difference in the presentation!
These actions have a number of useful applications. The following are some of the ways that you might use them:
- to add borders and frames to web sized images for slideshows and sharing on forums.
- to add custom frames and borders for use on your Recommendations or Gallery Pages.
- to add a border to photographs for printing (such as for session albums)
- to digitally mat your photographs before printing
There are over 20 actions in the set, which comes with a PDF User Guide, and free upgrades. The introductory price for the set is $20, available only through June 9, 2006. You will receive the action set within 24-48 hours after your payment has cleared.
**Please note: These are Photoshop actions, and you must be able to run actions in order to use them. Because of the electronic nature of this item, there are absolutely no refunds.**
The following is a breakdown of the actions included in the set:
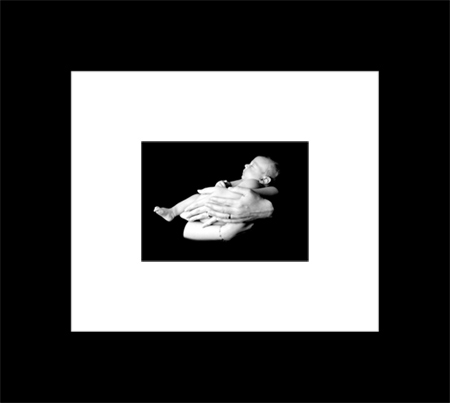
Frame w/1” Mat
I use this to add a mat and frame to my images for display on a Recommendations page. It gives the client an idea of what their images will look like framed.The defaults are black frame with a white mat. However, you can customize these to any colors you wish. You have the option of a 1/2 inch frame, a 1 inch frame, a 1 1/2 inch frame, and a 2 inch frame.
Frame w/2” Mat - Same as above, with a 2 inch mat.
Frame w/3” Mat - Same as above, with a 3 inch mat.
Frame w/4” Mat - Same as above, with a 4 inch mat.
Frame w/5” Mat - Same as above, with a 5 inch mat.
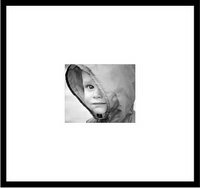
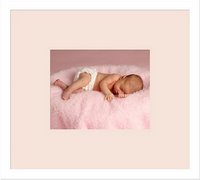
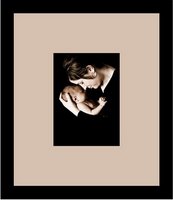
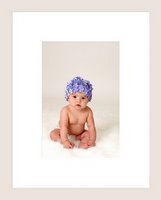
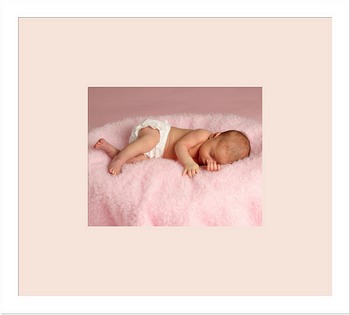
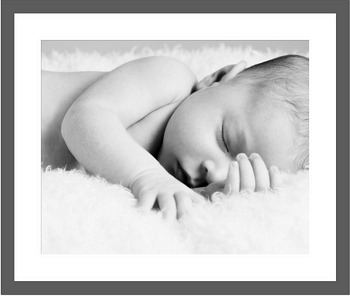
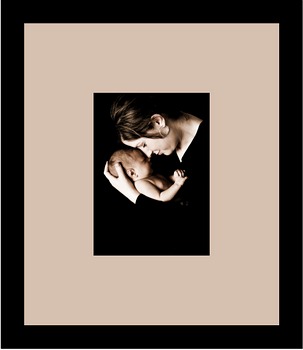
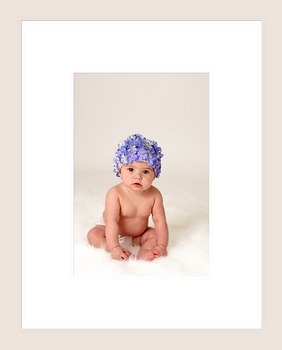
Some examples of the Frames w/Mats. As you can see, it works with images of any size or shape; both colors and sizes can be completely customized.

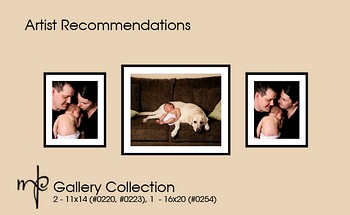
 An example using frames to design a Gallery Page to recommend to a client.

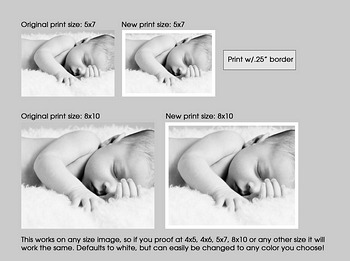
Print w/ .25” Border I use this to add a white border to my 5x7 prints, when I am going to be putting them in a session album.It will crop 1/4 inch from your image, and replace it with a white border (color can be customized). It is necessary to crop the image in order to maintain the same size and add the border.


Simulate “Gallery Wrap” This adds a basic drop shadow to your image. I use it when I want to show “Gallery Wraps” on my Recommendations pages.
Simple Frame Fit Image Size This will crop 1/4 inch from the image in order to add a thin border. I use this when I want to add images to my Recommendations page using the outside of the frame as a guide. In other words, if I start with a 5x7 image, the frame itself will be 5x7.
ADD .25” Border
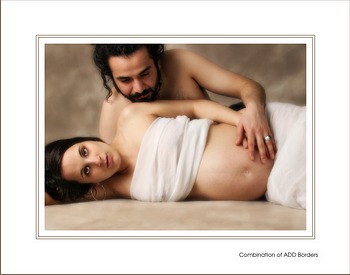
This varies from the Print w/.25” Border in that it ADDS a 1/4 inch white border to all sides on the outside of the print. This can be useful if you want to add a simple border for slideshows or proofing, but are unconcerned about the final print size matching the starting file. You can run it multiple times to create custom borders and digital mats. They can then be printed this way, or you can resize for the web. You can mix and match the ADD border actions to create custom sizes.
ADD .5“ Border - Same as above, with a 1/2 inch mat on all sides.
ADD 1“ Border - Same as above, with a 1 inch mat on all sides.
ADD 1.5“ Border - Same as above, with a 1 1/2 inch mat on all sides.
ADD Thin Border - This adds a thin border to all sides, and can be useful to add accent pinstripes to the mat.
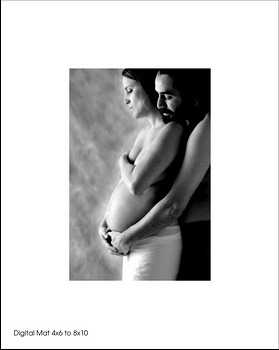
Digital Mats - Take any print and mat it to the specified size. (The image being matted must be smaller than the mat.) This is a great option if you have an odd shaped print and want to digitally mat it to a standard print size, 5x7, 8x10, 11x14, 16x20, 20x24.
BONUS Web Sized Borders
The Web Sized Borders at the end are additional borders for web sized images. They use them much like you do the full res borders, only they are intended for web sized images. These can also give you some ideas on how you can mix and match the various actions to come up with unique and fun borders!


